![]()
For all its wonder, the computer screen only offers two dimensions. There is only so much emersion you can get from two dimensions. To achieve three dimensions with a computer screen, you need a mechanism to provided different views to each eye. There are many techniques for achieving this, and each technique offers a tradeoff between cost, equipment, and quality. Using the anaglyph technique, only a cheap pair of red/cyan glasses are necessary. The 3D effect is achieved by the coloring on the glasses. The image is shaded using the red component from one source image, and the blue/green (cyan) components from another. The glasses mask one of the two images so each eye sees a unique image. If the images are produced correctly, the viewer will see a 3D scene.
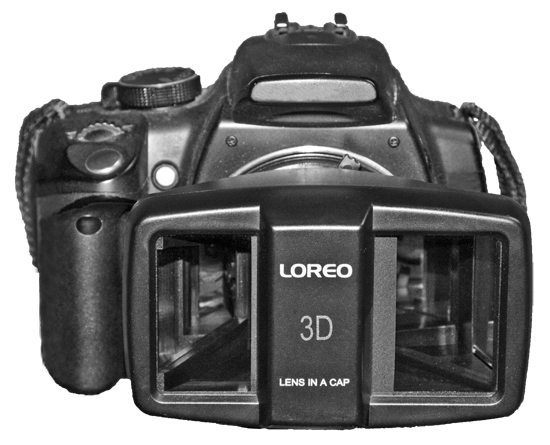
For the images created below, a single Canon Digital Rebel XT was used with a LOREO beam splitter lens. A landscape orientation shot is taken through the lens and two separate portrait side-by-side mages are captured to the digital image. Because the images are captured with some horizontal separation, the combined view perceived through the anaglyph depiction technique is roughly what a normal person would see from the camera’s point of view. Since red and cyan are used to masked the anaglyph image, the view is often suffers when red or cyan shades are present. Several techniques are used to get around this problem. One way to avoid coloring conflicts is to convert the image to grayscale first. A better way is to optimize the colors so that the shading still exists, but without sever conflict with the shading of the glasses. This technique maps conflicting colors to “safer” anaglyph colors.
The rig below is composed of a LOREO lens attached to a Canon Digital Rebel XT base. A landscape picture is taken at Aperture 11 or 22. The result is two portrait pictures side-by-side on the same image, separated by the distance of the LOREO beam splitters. Special software is used to combine the two images into a single optimized colored anaglyph. Because this method captures the two images simultaneously, this rig can be used to capture extremely fast subjects in motion. There are two limitations of this method. The first is that this lens requires an exposure at high apertures. This means that a well lit scene is required. Secondly, this is a “prime” lens, which means it has no telephoto zoom, and as such, you must be close to your subjects. Further, because two images are seen in the view finder, you need to focus on only one of images or you will get confused.
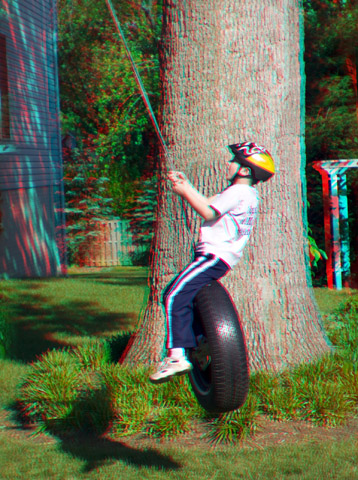
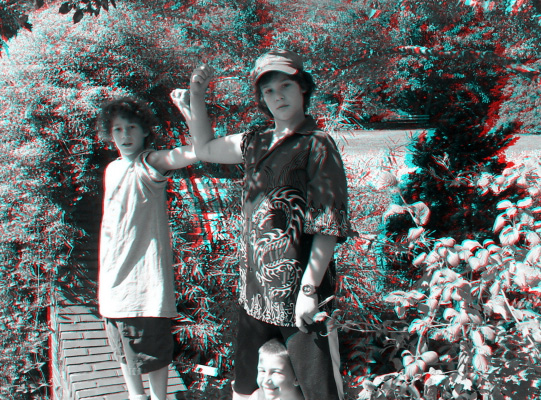
One way to take advantage of the Anaglyph technique is to ensure that each image contains subjects at varying depths. The range of depths from the closest to the furthest objects in the scene needs to be restricted or the viewer will experience eye strain. But, as is shown in the picture below, if the closest object in the scene is many feet away, the total range can be increased. This is because the parallax effect is less profound for the closest subject reducing the need to significantly displace the red/cyan images for the furthest subjects.
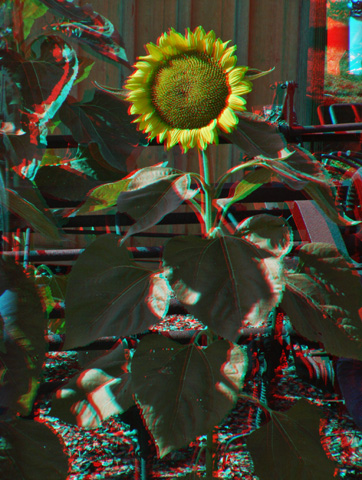
Besides the range of depth, it is always good to avoid red and blue colors when producing red/cyan or red/blue Anaglyphs. The scene below of a Sunflower is mostly green and yellow making it an easy subject for this type of immersion.
Again, placing subjects at different distances accentuates the 3D effect, and thereby increases the immersive quality of the Anaglyph.
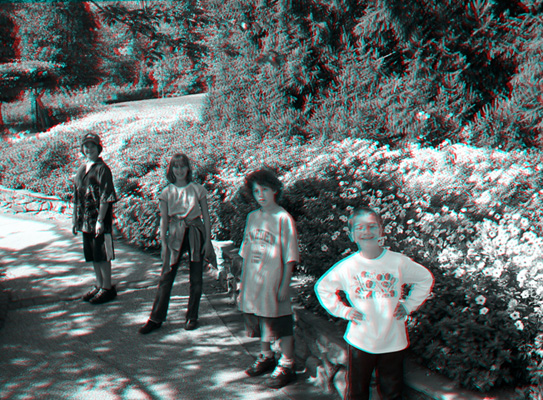
There is always the danger in having one element in the scene too close to the camera, and other elements too far away. The image below provides a good 3D effect, but the disparity between the distances of the objects is a bit to much. Again, creating Anaglyphs is as much an art as it is a Science.
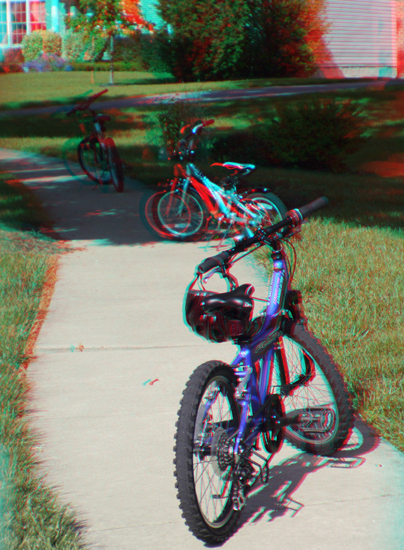
People can be placed at varying distances to provide cues for depth, but so can other objects like bikes. When composing a shot for stereo, make sure that the frame is level with the ground. Later, when fine tuning the mixing of the two compositional sources, verify objects in the center of the image are vertically aligned. Then find the nearest object in the scene (bike’s rear tire), and make sure that the red/cyan fringes are horizontally aligned. At this point, objects in the distance should have more horizontal displacement than closer objects. The more the displacement of the colors, the further the objects will appear using the Anaglyph glasses.